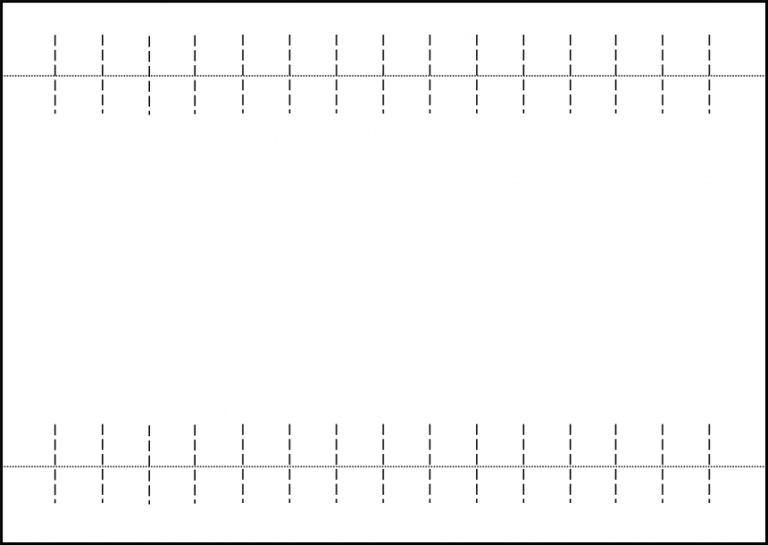
Lay the A4 paper out landscape orientation. Draw two horizontal (side to side) lines across the paper – one 3cm from the top and one 3cm from the bottom. Mark 2cm spaces along these lines. Now, at every 2cm point draw a vertical lines that extends 1.5cm above the horizontal line and 1.5cm below it. This takes a bit of time, but it’s good measuring practice and makes the final results more impressive. (If you have a printer you can print the ready marked page).
Create an Albarello jar inspired by The Courtauld’s Maiolica Ceramics
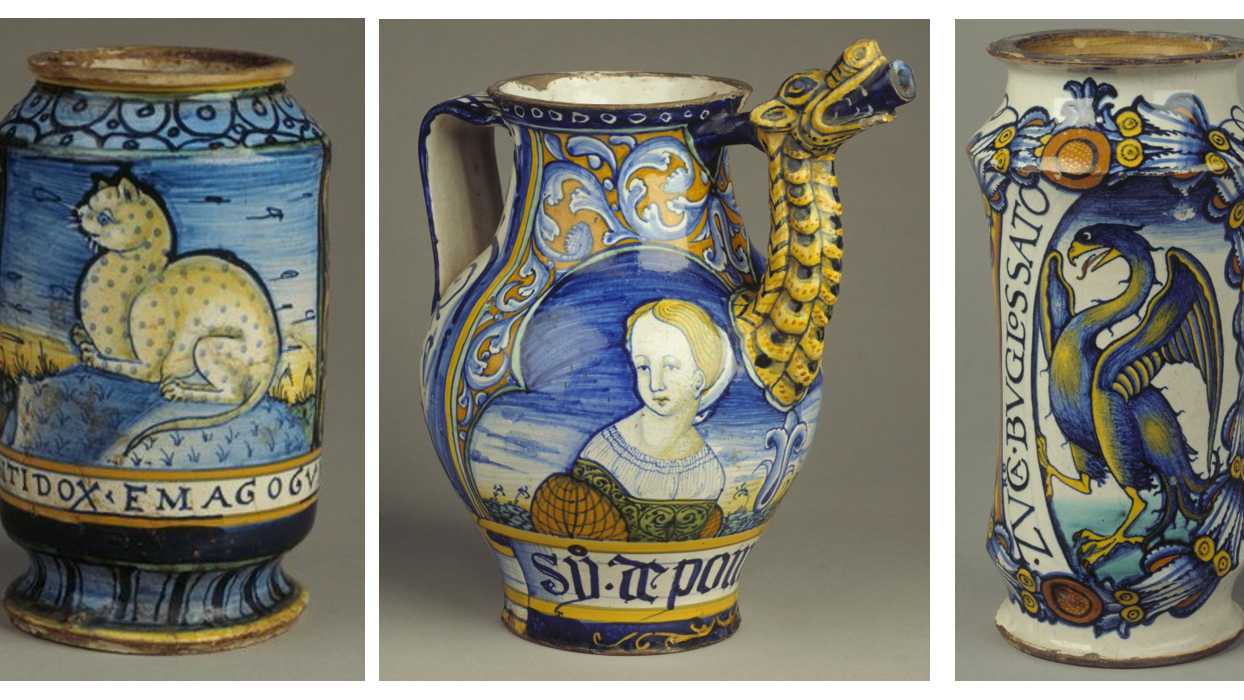
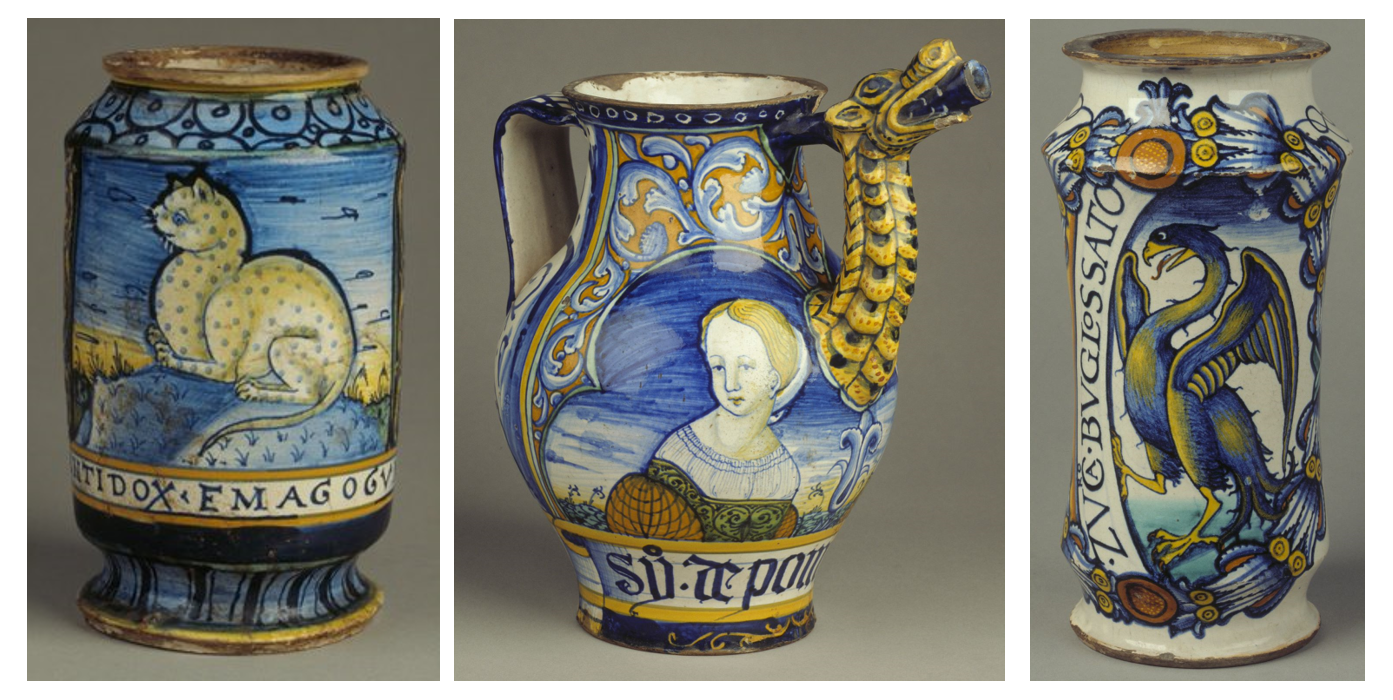
Some of the most colourful pieces in the Courtauld Collection are maiolica ceramics. Most were made in central and northern Italy and date from the first half of the 1500s. Maiolica pieces (pronounced mayolica) were shaped from white clay and glazed with a special mixture that included tin oxide. The decorations were made from brightly coloured pigments that could withstand very high temperatures as the ceramics were fired (baked) in special ovens called kilns.
Maiolica ceramics this old are very rare today, but in the 1500s wealthy Italians could go to their local apothecary (their version of a pharmacy) and buy an ointment or medicine in a beautiful jar known as an albarello. They would be decorated with plants and animals so that the customer would be encouraged to spend more on the products they contained, such as dried herbs and fruits. They might also have the name of the shop and the product written on them. The idea for these jars came to Italy via Islamic traders from the middle east.
Materials
- A4 white paper
- Pencil
- Ruler
- Coloured pencils
- Additional option: acrylic paints, mixing pallete, flowers and paint brushes
A Closer Look
- Which animals can you see? Do they look friendly? Which jar would you prefer to buy?
- How many colours have the artists used?
- Where do you think the clay came from to make the jars?
- How can you tell they have been decorated by hand?
- What do you think the empty jars could be used for?
Activity
Step 1: Preparing your Paper Jar
Step 2: Decorating your Jar
Fill the sheet of paper with patterns inspired by nature. Perhaps you have fruit, flowers or pot plants at home that you could draw from. Or, you could always look up some photographs online.
You can also create your own magical beast or do a quick sketch of the family pet!Eagles and dragons were popular choices for decorating maiolica objects.
Some ways to make pattern:
All patterns start with a motif or motifs. This is a basic design that you repeat in some way – a leaf could be a motif for example.
Borders and rows – You can add horizontal lines and fill these in with different designs. Maiolica artists seemed to love swirls and zig-zags.
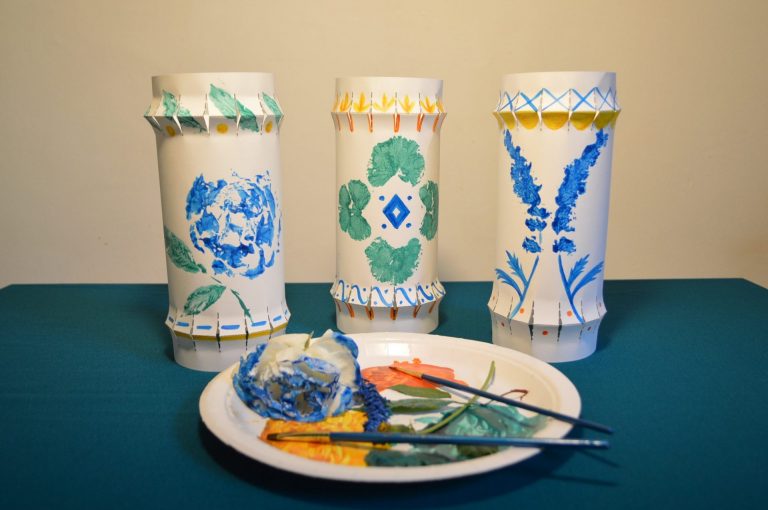
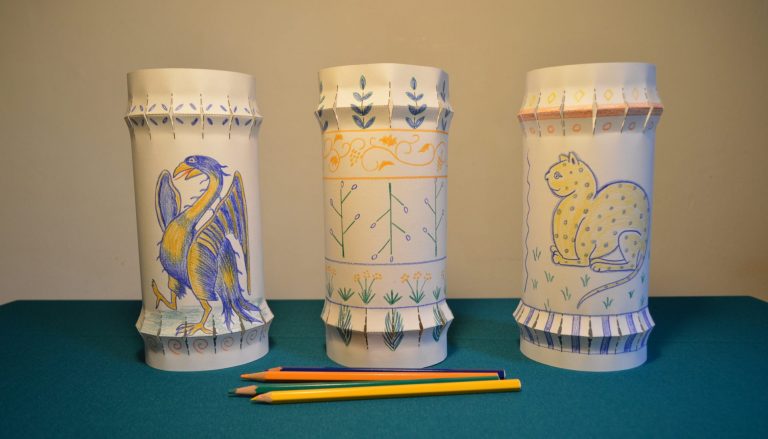
Alternation – Swap between one motif and another. For the top of the first jar above, we alternated berries and leaves.
Rotation – Turn a motif around a central point. For the middle jar above, we turned a geranium leaf around by 90 degrees four times.
Symmetry – Create a mirror image. For the third jar above, we printed using both sides of a lavender stem, imagining there was a line of symmetry running down the middle of the page.

Other decorating option: Printing with Natural Objects
Why not try incorporating real nature into the art making process? The results can be very colourful and striking.
Put different colours of paint onto a paper plate (we’ve used blue, green, yellow and orange to match the original colours). Gently dip leaves and/or flowers into the paint and then use these to print directly onto the paper. We used a rose, a geranium leaf and a lavender stalk, which smelt very nice! You can also add some details with a brush.
Step 3: Assembling your Jar
Fold the two longest edges of the paper backwards along the horizontal lines you drew. Next, cut all of the short, vertical lines – it’s worth taking care to do this neatly. Unfold the edges.
You now need to bring the two shortest ends of the paper together to make a cylinder. Have one end overlap the other by about 2cm and secure with glue, staples or tape. If using glue, use pegs or paper clips to hold the paper in place as it dries.
Finally, find a place to display your jar! The original majolica ceramics were proudly presented in cabinets. You could make some extra designs to form your very own collection.